The Swedish Carpenter’s Axe: Fixing a Poll for Forge Welding

I’ve let this website lay dormant for almost 2 years now while time has flown by in my shop – much of it spent on non-axe related work.  But that doesn’t mean that I’ve neglected axe forging – actually far from it.  I have forged a number of larger Norwegian style hewing axes that I
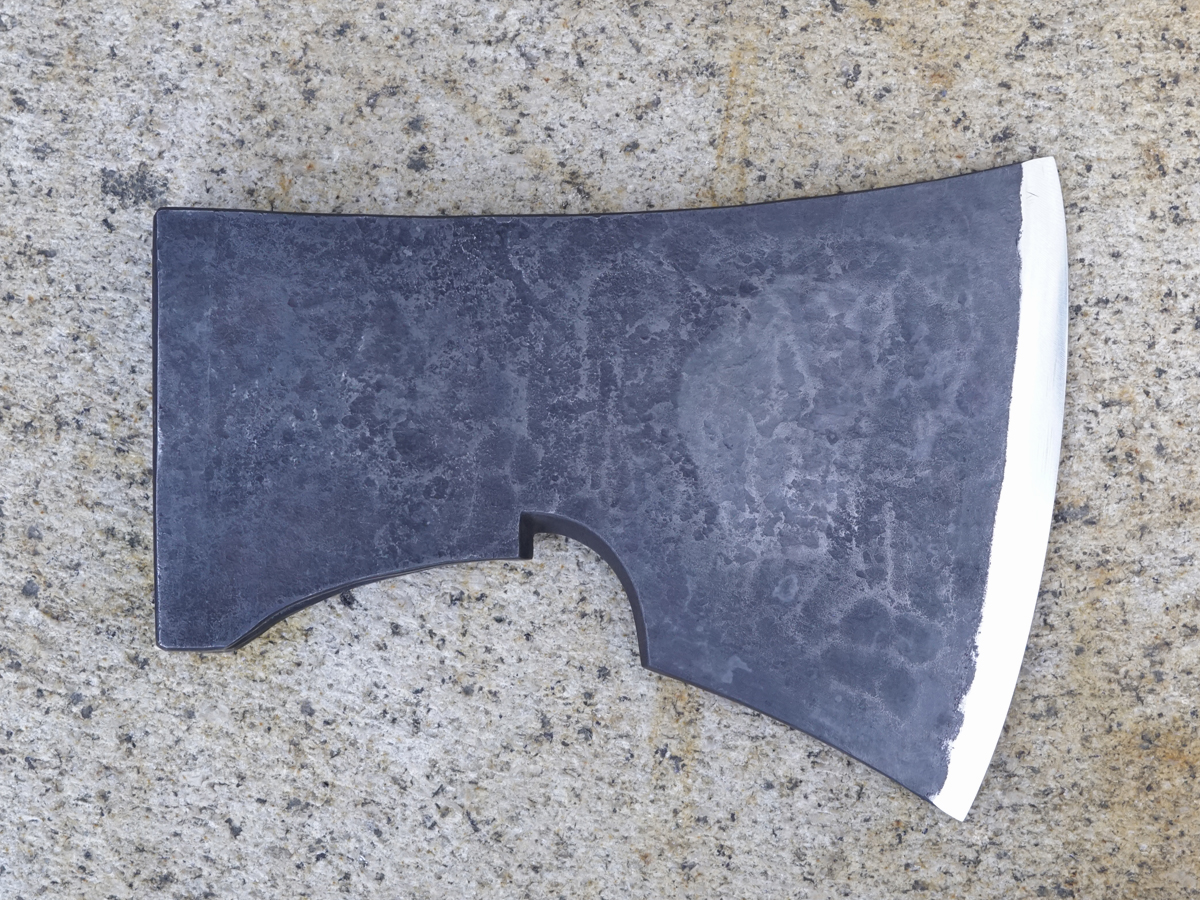
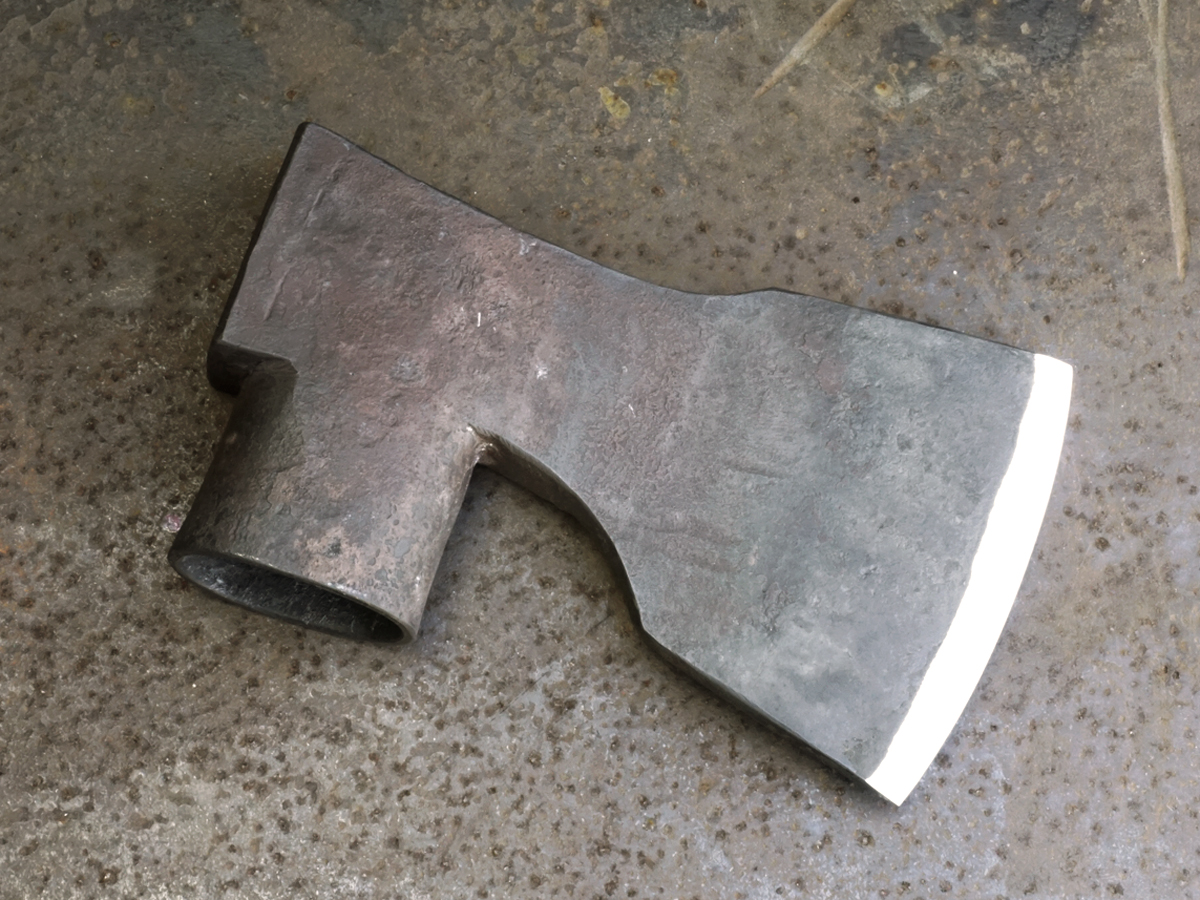
 am quite proud of – with edge lengths of about 7″ and weights of 5+ pounds.  Some of these are even out for trial use and evaluation among the traditional house builders of Norway!  I have also put a lot of effort on refining my techniques and tooling for forging Swedish style carpenters’ axes.  This post deals with forge welding polls onto those axes, which can be a bit tricky if you decide to challenge yourself by not tacking them in place by modern, electric welding (to keep them securely in place for the forge weld).

I learned to forge this axe from the very excellent Mattias Helje in Sweden in 2015.  When he got to the poll-welding stage he confidently gripped both the short poll and the axe body together with a pair of tongs and tacked the forge weld in a coke fire (which I also use).  In the process the tongs reached a high, yellow heat on the tips but kept their grip long enough to  get the tack finished in the upper corner.  From there, the rest of the weld was carried out in the usual way – assured by Mattias’ expertise.  I found this process to be a bit daunting, and, until recently, it didn’t always work for me – leaving me in the position of going back to tack the poll in place via TIG welding to complete the forge weld.

To work around the difficulties I had with the tong-hold, but also avoid the use of electrical welding, I decided to try a blind rivet to hold the poll and axe body together during the forge weld.  It’s not hard to do and doesn’t take much time.  However, it does take a certain feel to get it right during the two phases of blind riveting it.  The trick is do the hot, blind riveting at the right tempo.  If you do it too slowly the rivet can get too hot and bend (especially if the rivet is thinner).  If you do it too fast the end of rivet may not heat up enough to upset within the poll or axe body and get a solid grip.

I would be happy if any of you could recount to me your experience with using this technique for welding axe polls, hammer faces and the like.  I’m sure some of you have already thought of it or learned it and use it from time to time.  I love discovering more about the vast array of techniques that traditional blacksmiths and other tradespeople use to solve problems by simple and elegant means.  Finally, I wish you all safety and equanimity in these uncertain times of the covid-19.  I feel lucky to be doing what I do and to get the chance to share it with you.

Yours, Jim.

Forging Study for a 5″ Norwegian Carpenter’s Axe

5 inch axe tiny
On my most recent trip to Norway in May, 2017 I got to meet with the eminent traditional house builder and author Henning Olstad. Besides visiting his beautiful farm I had the opportunity to study several of the axes that he uses everyday to build houses in the many traditions of Norway. One commonly used axe was simply designated as a “5 inch carpenter’s axe” and it seemed to me like a good model to learn more about Norwegian axe forging. I made tracings and took pictures of this axe, and asked Henning to explain some of the characteristics which were important to its performance. In addition to all this I had recorded the forging of an almost identical axe in Norway by the blacksmith Øystein Myhre 2015 at his beautiful smithy in Sandefjord.

Based on this information I began my first trial-forging of this axe in April. The goal was to record carefully the process of forging a fairly close rendition of Henning’s axe so that my follow-up versions could “hit the mark” – so to speak. It turns out that I got quite close with this first version, and I am very happy with it! If anything it came out a little bit larger than intended (5.75″ edge vs. the goal of 5.0″, and 1.8 kg. vs. the goal of about 1.65 kg.) I have already started another 5″ axe and downsized the starting materials for it about 10% to aim for the lower weight. Hopefully the next one will look as nice as I think this one does!

Axes for Sale

Mess of Axes medium

In 2016 I traveled to 3 places to teach or demonstrate traditional axe forging.  They were:  Ferndale, California (Spring Conference / California Blacksmith Association), Peters Valley, New Jersey (the PV school of crafts) and Salt Lake City, Utah (ABANA Conference).  In each case I brushed up on my skills in the weeks leading up to the event, and ended up with about 15 unfinished axes at the end of the year.  Now, in 2017, I am starting to finish them all and they will be available for sale!  If you are interested in what you see here please PM me via Facebook or the message feature at Forgedaxes.com and I can quote you sizes and prices – and send you pictures of individual axes.  The edge lengths on the pieces you see here range from 2.4″ (Swedish style felling axe) to 7.9″ (Viking style broad axe).

Making Viking Age Tool Steel

This year I will be teaching a class on the making and use of a common type of tool steel which was forged into tools and weapons in the Viking era. It is now often called “Shear Steel” to denote its high quality, i.e., suitable for demanding use in the blades of shears. The process will give the students a fascinating look into the relationship between heat, carbon, iron and steel, which is the fundamental basis for the Iron Age. The material we produce will have all of the characteristics we would want in a simple, modern carbon steel except one – boring homogeneity. It will be very close to the the tool steel a Viking blacksmith would have been familiar with. One of its remarkable and historic qualities will be its watery, layered structure – not seen in any modern steel. When welded into the blade of a tool or knife, then hardened and polished shear steel will have a beautiful grain like fine wood which is both decorative and evocative of the lively and earthy materials created and used by our ancestors.

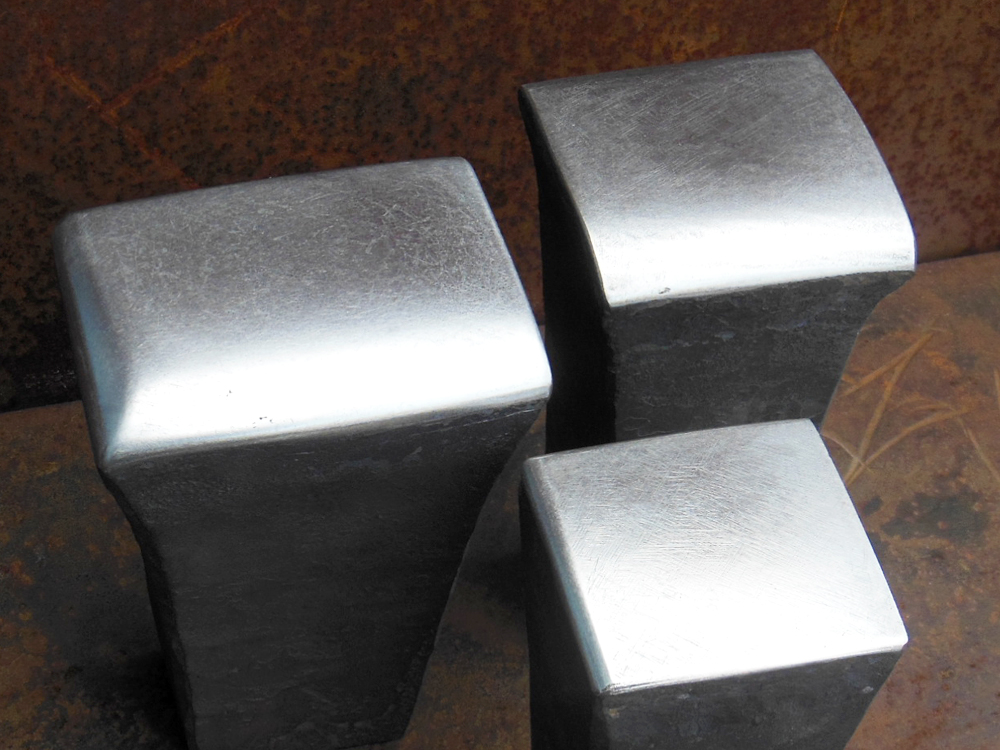
My First Go at a Horned Anvil in the Viking Style

Over the last couple of weeks I put some of my free time into forging a small, horned anvil with my friend Jonathan.  I chose a simple form reminiscent of some of the horned anvils of the Viking era – basically a squarish anvil with a tapered base and a small, flush horn off of one face.  The idea was to gain some skill with assembling an anvil body with a horn and to face both the body and the horn with one plate of steel.  For the body and horn I chose mild steel and for the face I chose 1060 steel which withstands forge welding quite well and is nicely hardenable.  To join the body and the horn so I could heat them together in a coke forge I borrowed an idea that I got from a random picture I saw on the internet.  It was a copperplate engraving which showed the horn tenoned through the top of the anvil – probably from the Diderot encyclopedia.  I scarfed the horn so that I could blend the seam of the weld to the body and it worked quite well.  The steel face was tacked on with a few TIG welds to keep it on during its welding process.  When it all survived the quench to harden the face I was very relieved!  The anvil weighs 4.7 kg (10 lbs 6 oz) and is a little over 7 inches tall.
Below are pictures of the process and here is a LINK to video footage of welding the horn.

Shop Opening at Wrought Academy on Saturday, September 3rd


Date:  September 3rd, 2016  (Saturday / 10am – 6pm)

Location:  Wrought Academy / 2440 Adeline Street / Oakland  CA  94607

Free Event / All are Welcome!

If you’re curious about the shop and the classes offered at Wrought Academy this is your chance to drop by and see what’s going on!  We will be forging throughout the day to give you an idea of some of the skills taught here.  Class projects will be on display as well as pieces from Jim Austin’s collection of forge work and tools.  See you at the forge!


These pictures show the action at a recent blade-smithing class at Wrought Academy:

Forging Tour of Norway and Sweden / May 2016

This year in May I got the opportunity to return to the Hjerleid Craft School in Dovre, Norway to teach a one week class on forging hammers in the Viking tradition. The year before I had taught Viking era axe forging – also at Hjerleid.  Benjamin Kjellman-Chabin, the regular instructor of these students during their one-year blacksmithing course, was gracious enough to open this possibility to me once again, and the director of the school, Helle Hundevat, was generous enough give it her blessing. The students were a fine, enthusiastic lot and all succeeded in forging hammers by a historical and fascinating set of techniques.

Simple Viking Style Anvils

I’ve been trying my hand at larger forge welding projects and decided to make some simple anvils in a style common to the Viking Age. The anvils were presumably mortised into stumps fairly deeply to give them good support for hammer work. The main challenge in anvil forging is to weld a high carbon steel face plate to a body of mild steel. The weights of the anvils shown range from 5 to 8 kilograms (11 to 18 pounds). The forge welding is done in a coke fire with the high carbon steel face tack-welded on the corners to the mild steel body. The most important thing is to be patient and get the pieces evenly heated to a very bright welding temperature without burning the steel face. Anhydrous borax is used as the flux. The welding is done with striking hammers wielded by two-man teams – usually myself and a friend. It typically requires 8 or 10 heats to finish welding and shaping a small anvil and the work is hot and strenuous. Nevertheless, we are gaining experience in heating larger masses of metal and learning different methods to get the welding done. The videos show short segments of the welding work. Someday I hope to turn out similar anvils with horns so I can forge Viking style axes with the proper tools!

Video: First Welding Heat

Video: More Face Welding

Video: Blending the Seam Between the Face and Body

Video: Smoothing and Shaping the Face

Forging the Swedish Carpenter’s Axe

Swede B 320

Since watching Mattias Helje forge a beautiful, traditional carpenter’s axe in Sweden in 2015 I have done several trials of forging this axe myself.  At first I concentrated exclusively on the eye and socket – the hardest part of the axe to understand.  Recently I began to forge and understand the axe as a whole.  In the forging process all of the features of the axe are interrelated, and these relationships have to be understood just as well as the forging techniques.  This takes a LOT of practice.  Numerous axes were started to answer just a single question about a measurement or choice of technique, and there were many questions to answer.  At last it looks like I’m getting close to my goal – there are only a few points to clear up about the forging of this piece before I get ready to demonstrate it in April for the California Blacksmith Association.

This axe is 7.25″ long, has an edge length of 4.75″ and weighs 1270 grams.  The body is mild steel and the edge and poll are 1075 steel.

During the Summer

Here are a few pictures of axes I made in the last couple of months, as well as some pictures from the Sonoma Coast and an amazing sunset as seen at my shop in West Oakland. The customer for one of the axes requested that I overlay some silver runes onto the poll. It was a gift for one of his commanding officers in the Army.