Skip to content
  • Classes
  • Blog
  • About
  • Contact
FORGED AXESby James Austin
  • Classes
  • Blog
  • About
  • Contact
0
Axes & Straight Blades

Forging Study: 5″ Norwegian Carpenter Axe

On May 15, 2018 by jaustin

On my most recent trip to Norway in May, 2017 I got to meet with the eminent traditional house builder and author Henning Olstad. Besides visiting his beautiful farm I had the opportunity to study several of the axes that he uses everyday to build houses in the many traditions of Norway. One commonly used axe was simply designated as a “5 inch carpenter’s axe” and it seemed to me like a good model to learn more about Norwegian axe forging. I made tracings and took pictures of this axe, and asked Henning to explain some of the characteristics which were important to its performance. In addition to all this I had recorded the forging of an almost identical axe in Norway by the blacksmith Øystein Myhre 2015 at his beautiful smithy in Sandefjord.

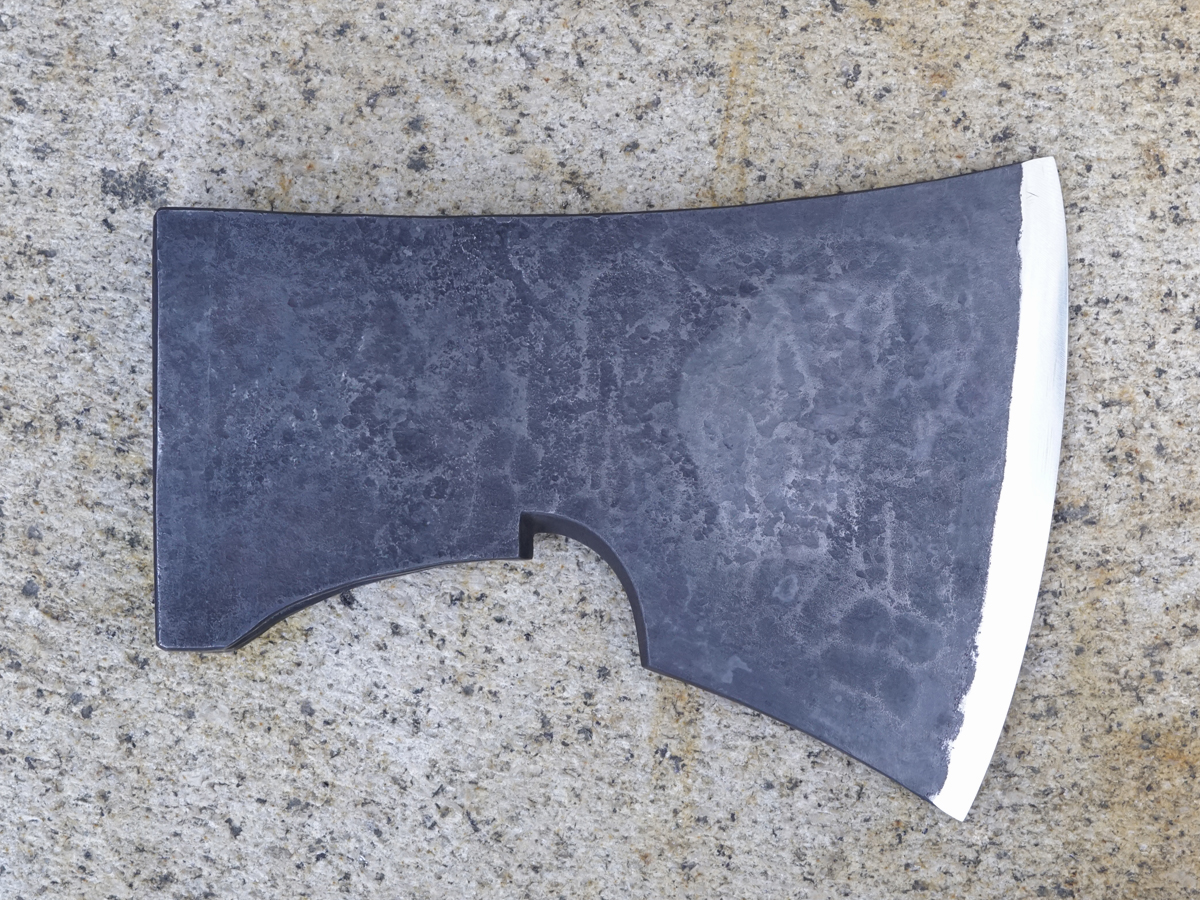
Based on this information I began my first trial-forging of this axe in April. The goal was to record carefully the process of forging a fairly close rendition of Henning’s axe so that my follow-up versions could “hit the mark” – so to speak. It turns out that I got quite close with this first version, and I am very happy with it! If anything it came out a little bit larger than intended (5.75″ edge vs. the goal of 5.0″, and 1.8 kg. vs. the goal of about 1.65 kg.) I have already started another 5″ axe and downsized the starting materials for it about 10% to aim for the lower weight. Hopefully the next one will look as nice as I think this one does!

Norwegian Carpenter Axe 005
This is the starting piece for the axe body. It is mild steel and weighs 2.10 kg. The markings show its dimensions and the layout for fullering the eye.
Norwegian Carpenter Axe 010
The body of the axe has been fullered to divide and distribute its mass for the eye and blade.
Norwegian Carpenter Axe 020
I’ve hit my planned length- and width dimensions for the eye material and the body material is ready to fold.
Norwegian Carpenter Axe 030
Here the body has been folded in preparation for the first forge weld. A shim of 1075 steel has been inserted at the eye to secure the weld there as I feel that it improves the strength of the weld at this critical position. It will blend into the body during the weld and not be visible in the finished piece.
Norwegian Carpenter Axe 040
The body is now welded and drawn down a bit. I got it so hot for welding that I found some steel in my forge afterwards which had melted off of the body and cast itself into the tuyere. It was a very solid weld!
Norwegian Carpenter Axe 050
Here I have used a newly-forged and ground mandrel to shape the eye of the axe. Normally speaking, I would not shape the eye so close to finish at this stage, but I kept testing and modifying the mandrel during the process and went further than I had intended. Nevertheless, the eye turned out very well.
Norwegian Carpenter Axe 060
Here I have forged a plate of 1060 steel to add to the poll of the axe for toughness and balance. I cut the long sides of the plate with a round fuller so that fins on the edges are formed which I can bend forward to clasp the back of the axe.
Norwegian Carpenter Axe 070
Now the steel plate has been forge welded to the body. I really enjoy this process and it went very well!
Norwegian Carpenter Axe 080
In preparation for fitting a bit into the front of the axe I cut a slot into the body and forged the lips of the cleft to match the cross-section of the bit. You also see the traditional axe tongs which I learned about and copied from old examples which were collected and used by my friend Mattias Helje. They are eminently suited to their job and hold the work like a vise!
Norwegian Carpenter Axe 090
This picture shows the form of the steel bit and its fit-up to the cleft in the axe body. The steel is W1 (1% carbon) and most of it is in front of the axe, with a thin steel “fin” which is embedded in the body. In fact, the fin is quite a bit wider than it needs to be, but I had cut the slot for it too deep earlier in the forging process and I decided to fill it with steel.
Norwegian Carpenter Axe 100
A better view of the fit-up. The steel is about 1/2″ thick in front.
Norwegian Carpenter Axe 110
The steel is trimmed and ready to weld. This joint geometry was a joy to weld together – something about it just seemed to go better than usual. It was partly to do, perhaps, with the parts being heavier that I am used to, but I also think the stumpier, shorter taper on the lips was beneficial. The mild steel blended so easily into the W1, and I will soon try this approach again.
Norwegian Carpenter Axe 120
Here the steel has been welded in and the blade has been drawn close to its finished profile. All of the shaping of the axe to this point has been done entirely by forging, but there is still a detail I want that I will have to cut in. On future axes I plan to forge it too!
Norwegian Carpenter Axe 130
Norwegian Carpenter Axe 140
The finished axe.
Norwegian Carpenter Axe 150
Another view.
Norwegian Carpenter Axe 160
Another ‘nother view.

7 comments

  • Mike Laine May 16, 2018 at 1:44 pm - Reply

    Predictably beautiful work. It’s a joy to see this traditional work developed here in our back yard, and done so well. Your work and curiosity makes the Bay Area a better place. Thanks!

    • jaustin May 21, 2018 at 9:44 pm - Reply

      Thanks for your support Mike! In truth I admire you as a craftsman and a friend.

  • William Richter May 16, 2018 at 3:20 pm - Reply

    Thanks, Jim, sort of. Nice work as usual, very illuminating explanation and pics, but now I’m salivating for a tool, or one of your classes.

    • jaustin May 21, 2018 at 9:45 pm - Reply

      It’s very nice to hear from you William! No need to salivate – come by and say hi sometime!

  • Mark May 16, 2018 at 4:09 pm - Reply

    Thank you Jim,
    When you are preparing for fitting the bit into the front edge how are you cutting the slot in the 1075 shims that have been welded in to form the lips of the cleft?
    The blending of mild steel to 1075 to W1 is good info, thanks again for sharing.

    • jaustin May 21, 2018 at 9:48 pm - Reply

      Hello Mark: On that axe I cut the slot for the bit with my bandsaw (it took awhile). Although I was essentially cutting through the 1075 bit it was totally annealed and was no problem at all. Someday I will come up with a hotwork solution to that step, but sawing made sense at the time. Thanks for your interest! Jim.

  • Morshed Alam January 3, 2019 at 6:34 pm - Reply

    These axes look incredible. Thanks for sharing!

Leave a Reply Cancel reply

Your email address will not be published. Required fields are marked *

  • Axes & Straight Blades
  • Classes
  • Events
  • Metallurgy
  • Tools
  • 2020 (1)
  • 2018 (1)
  • 2017 (1)
  • 2016 (6)
  • 2015 (8)
  • 2014 (16)
  • 2013 (5)
  • 2012 (5)
  • 2011 (2)

Copyright FORGED AXES 2025 | Theme by ThemeinProgress | Proudly powered by WordPress